

Armadillo track editing tutorial
Displacement mapping: Designing with terraced plateaus.
by mike_mccue

Here
is tutorial that describes a method of creating a naturalistic styled
displacement map using Photoshop. You can see the step by step process
used to design the Displacement map shown below.
Have you ever worked with a detailed track map where the grey
tones were so soft and smooth that it is hard to imagine how different
sections relate in elevation. Say for example you have three points on
a map and you want to know if one is exactly half way between the the
elevations of the other two. You have to really start paying attention
to your color picker. Its tough to do.
This technique uses flat grey tones to make visualizing the
terrain contours easy and that is really useful in the early stages of
laying out a track.

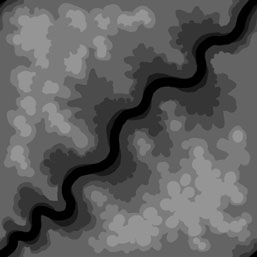
This
track is very much inspired by Scumbiker's a River track. The idea
of a river or canyon running thru the terrain has been a common theme
in many of my tracks. I am interested in the way you can layer and terrace
trails along the cliffs and ledges and present interesting views across
and into the valley.
I began this track with a pretty clear vision of the finished
terrain. I wanted the valley to be more like a ravine, a twisty densely
vegetated scary place that riders would want to avoid (or find irresistible).
The trails above were to be tight like a hiking trail for a real trail
riding stop and go experience. The track layout details were to be worked
out once I had a natural terrain that would seem suitable.

Ok,
You have to start someplace so here is a bottom layer with a 100,100,100
fill.
I intend to import the final displacement map with a 255 height
setting so each grey tone level will equal approximately 1 foot in the
MCM2 game.
The 100,100,100 fill represents a 100 foot elevation.
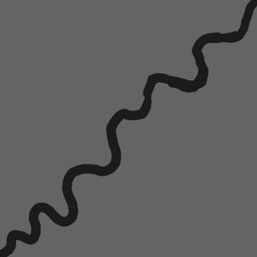
Cool huh? I painted a twisty 000,000,000 black stripe diagonally on a new layer. (Believe it or not: I have been preparing for months to draw that stripe) I sketched a few different stripes. This one seems good.
Add a layer under the black stripe (but over the 100 grey background) and paint a wider stripe that is 025,025,025.
Its probably a little hard to see it here.
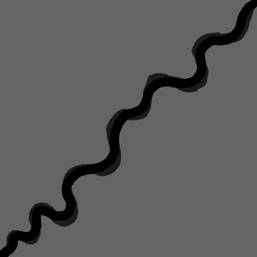
Add
a layer under the 025 stripe (but over the 100 grey background) and paint
a wider stripe that is 050,050,050.
Paint the edges to suggest erosion and geologic features.
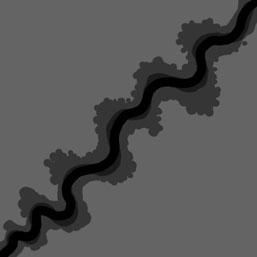
Add
a layer under the 050 stripe (but over the 100 grey background) and paint
a wider stripe that is 075,075,075.
Continue to paint the edges to suggest erosion and geologic
features.
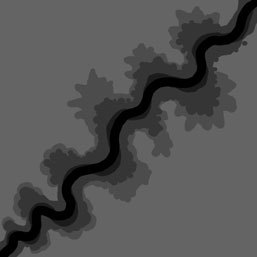
Add a layer (anywhere above the 100 background) and paint some stuff at 125,125,125. These will look like hills (or something like that :-).
Add a layer (above the 125 layer) and paint some hills at 150.

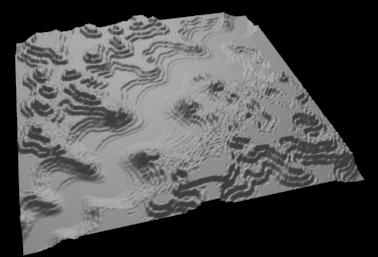
This is what it looks like in a 3d render
Now
its time to start thinking about how the terrain will tile so that the
edges will join with the adjacent tiles.
The image here has been "offset" to wrap the edges
to the center. You can easily see that the corners (which are now at the
center) are not going to match up smoothly.
The offset filter works best on a single layer so make a merged
copy of the artwork in a new layer. Select Filter/Offset. In this example
the image is 257x257 pixels with a offset of 128,128 with the "wrap
around" selection checked.
Hand paint across any edges that do not match up.
This
image had been reset with a reverse offset.
In Photoshop choose Filter/Offset. In this example the image
is 257x257 pixels with a offset of -128,-128 with the "wrap around"
selection checked.
Get familiar with this process and do it again when you think
other edits have changed the edges.
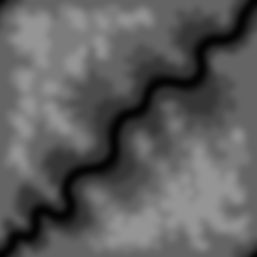
This
image is the result of a Guassian Blur at 3.0.
Up to this point the painting has been visualized as terraced
plateaus spaced 25 units apart ( the colors used were 000, 025, 050,100,
125 gray tones ) but now it has a softer contiguous tone effect.
The image has been posterized to 25 levels. The terracing is in finer increments at approximately 10 unit spacing (The 25 levels divided by a 255 gray range = 10.2). and the curves are a bit more natural. The terraced appearance may not be suitable for the final design but it will be very useful for laying down a trail.

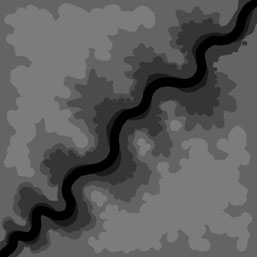
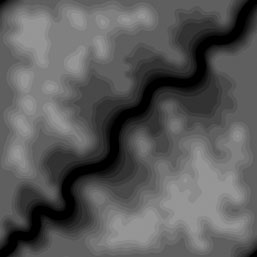
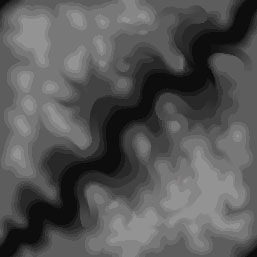
Here
is the finalized "Natural Base terrain". It is ready to have
a trail carved into it.
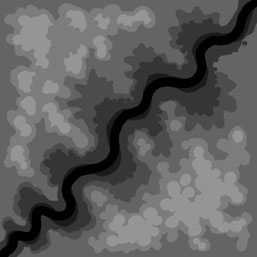
This is an edited version of the image above. The edges have
been cleaned up for tiling using the offsetting procedure described above.
The river bed is wider and its hard to see but the level has been raised
a bit (from 000 to 013). You may notice other details where I have modified
the contours and plateaus a bit.
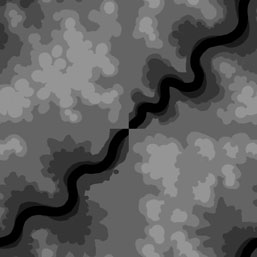
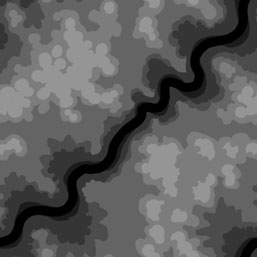
Now it is time to do a lot of test riding and exploring.
This is what it looks like in a 3d render
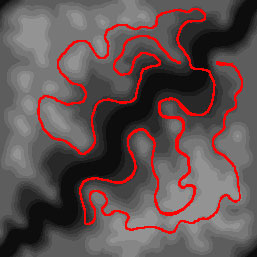
Here
is the track design. The red stripe is painted on a new layer. I use a
bright color to emphasize that it is just a reference layer. Keep this
layer updated with any changes too the track. You can use the reference
later when making a texture map so keep it accurate.
The layout is the result of a lot of test riding and close
inspection of the map.
I hope to make a detailed tutorial about laying the trail
out. Lets move on for now.
This
image shows the results of lots and lots of tweaking and testing to create
a pathway for the track. Look carefully and you will see the paths, ramps,
and grooves added along the corridor suggested by the red line.
Once again, I hope to make a detailed tutorial about laying
the trail out. Lets move on for now.
This is a Flash animation that fades between the images shown above. Watch it cycle thru a few times to get some idea how the track was laid out.
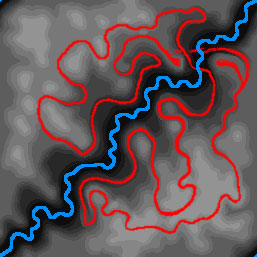
This image includes the addition of the watercourse which is painted on a separate layer. In this map the riverbed is at 013,013,013 and the watercourse is painted at 008,008,008.
Here you can see a reference layer with the watercourse painted in bright blue to make it easy to see. The layer can be used as a reference when painting the texture map. Keep it updated as you work.
You may also notice that the Red track reference layer has been slightly modified in the top right corner.
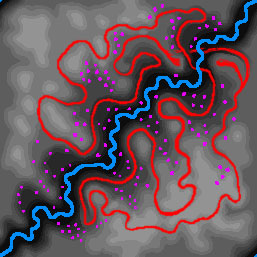
The
purple blobs are part of a new reference layer that will be used to create
some rocky terrain features. This layer will be used to help with the
texture map later so keep it updated as you work.
Place all the "rocks" using this layer.

Here is an image with the rocks added.
Create
a selection from the Rock reference layer. Copy "all layers"
( ctrl, shift, C ) and paste into a new layer. Raise the rocks a bit using
the Levels function.
This technique lets you easily raise the levels relative to
the local terrain. Its a lot easier to add rocks this way than hand painting
each one at the correct elevation. Furthermore the reference layer makes
it very easy to paint the rocks on the texture map

This
is the final image for this tutorial. It is the same as the big image
at the top. You can still see a lot of terracing on this track and that
seems to work in this design but you can use this technique and finish
the terrain with a wide variety of styles.
Wow, you made it all the way to the end. If you are still
curious you can click
here to download a zipped Photoshop .psd file of the terrain and reference
layers.
This
is just one of the many ways I approach track design and
hope you find this tutorial helpful in some way,
mike_mccue